


Reloading and Shooting activity for Cha Bei, Family and friends. .. AKA Heavy Metal Recycling !
Showing posts with label Reload Info / Basic. Show all posts
Showing posts with label Reload Info / Basic. Show all posts
Tuesday, 14 February 2023

Friday, 29 December 2017
2017 BEST Reloading Accessory (ever)
Screwed and Glued for your continued pleasure and enjoyment.
Titebond glue and Quadruple Pocket Screwed. Only requires a small Vice to be serviceable.


Sunday, 28 October 2012
Stepping through the process sequence, 11 thu 18
Now entering the production phase, follow a methodical procedure. DO NOT force any step in cycling the press – very moderate resistance is mostly in station1, case forming/de-priming. Make sure the mouth of the Powder Funnel is clean, watch for brass build up.
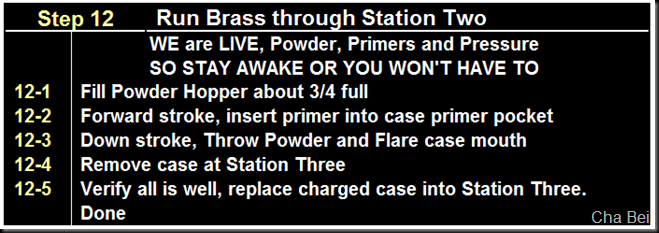 Now, remember to load bullets at this station. Visual check that powder is is in the case. An Auto Powder check die can be set up in station 3
 14-3 Ensure the Eject Wire performs its function .. you DO NOT want a loaded round going into station 1 !!!!


 Visual: New Primer is seated correctly .. good to go.

 Make sure the mouth of the Powder Funnel is clean, watch for brass build up.
 Now, remember to load bullets at this station. Visual check that powder is is in the case. An Auto Powder check die can be set up in station 314-3 Ensure the Eject Wire performs its function .. you DO NOT want a loaded round going into station 1 !!!!


 Visual: New Primer is seated correctly .. good to go.

Stepping through the process sequence, 10 of 18


Stepping through the process sequence, 8 & 9 of 18
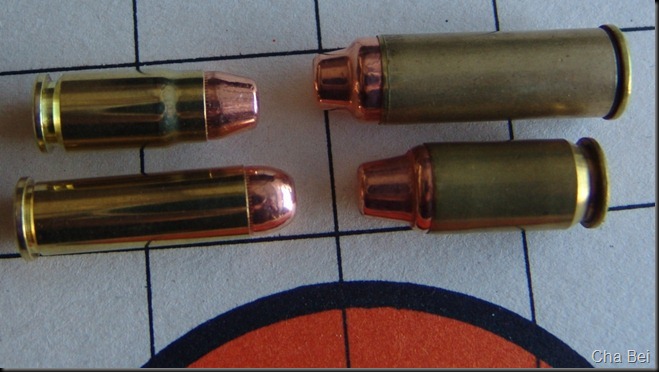
Setting Seating depth and cartridge Overall Length

Confirm OAL with Reference source: SIG 357, 1.140” to 1.130” Set in middle of tolerance range: 1.1350”

Moving right to step 9, station 5 to set the case crimp.

Saturday, 27 October 2012
Stepping through the process sequence, 7 of 18
On this step we ONLY set the Case mouth flare.


This diagram shows correct amount of Bell-Mouth required

Stepping through the process sequence, 4, 5 & 6 of 18
These next 3 steps are easy in content and go quickly. BUT again attention to detail Step 4-6 !!!


Tip: 4-6 the last 1 or 2 primers will stay inside the YELLOW pick up tip .. gently push them free into the tube. (I use a clean aerosol plastic tube) This will avoid any Flipped primers going into the press.


On to step 7
Friday, 26 October 2012
Stepping through the process sequence, 3 of 18


A methodical approach with attention to detail is required. The Dillon XL 650, progressive press, and its peers, represent the most mechanically complex pieces of equipment you’ll find when reloading at home. I have seen some one-off, hand made, Rube Goldberg contraptions built by “Shade-Tree Re-loaders” Namely: One Eyed Jack and Three fingers Pete.
This is typical of my work station during a Press Run. No unnecessary stuff in the area. Clean and well lighted. I can tell the Low Primer indictor has sounded (rod is bottomed out) I need to recharge the primer tube, top up the powder hopper and empty the finished rounds bin .. but we are jumping ahead.

3-1 through 3-8, are primarily visual, area inspection and clean up as required. The simple punch list helps determine what has to be done to reconfigure for the next run.
Prior Session: Caliber: 357 SIG .. Small Pistol Primer .. Powder AA#5, Hopper is 1/2 full and the Small Pistol Primer Plate is installed.


3-9 From the punch list information you can establish the Change over Kit and parts required. Reference the manual, page 44 - the Caliber Conversion Chart.

3-10 through 3-21 .. Working methodically, items a) thu j) and all the required parts will be pulled together.
Changing from: 357 SIG to 9mm Luger.


3-22 .. DO NOT rush this. Removed parts do have a home, put them there. Hardware that will be Re-Used leave at the press.
First I open an empty powder canister, Remove the 357 SIG Tool-Head. Empty powder into canister and store.
Put the SIG tool-head on the stand, remove the Locator Pins and Shell Plate, put these parts in the tool stand and store.
Remove the Case Feed Bushings, Station 1 locator and store.
Done with the removal .. I’ve used this press since Aug 1996, so this is Old-Hat, but the devil is in the details
3-23 and 3-24: .. DO NOT rush this. Rebuild the press from Case Feeder down to Shell Plate.
Case Feeder, empty and ready. Change out the CF bushings (Green) and adaptor (Small)
Install the #5 Case Feed Plate and Ejector Clip. Insert the 3 station pins and Station 1 Locator.
Install Tool-Head and connect Fail-Safe rod into Powder Bar assembly
Visual check .. Index slowly .. double check .. Ok? Done!
Step 4 is next.
Subscribe to:
Posts (Atom)